
We begin the tutorial, it needs to be underlined that in the future I am also still learning
The steps are:
1. Of course, that will open the Photo Edit, here sya using Photo of a former mine, Hilary Duff

2. After that Duplicate Layer

3. Right-click the >> Duplicate Layer, doker Windows will appear as shown below
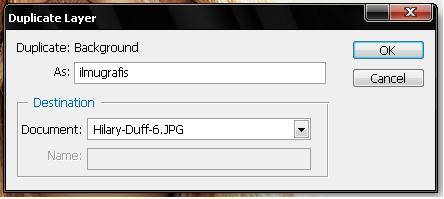
Rename the layer as you please our example I use ilmugrafis, to ease my benjelaskan course, because it was not affecting
4.Once duplicated, Blur layer with Smart Blur (Filter >> Blur >> Smart Blur)

Adjust the radius and thresholdnya according to the resolution that your photo manipulation, so it's up to you, with a note not too.
5. After selesay with the above change Background and Foreground Colornya like the picture below I marked with the number 1 (one)

Then press Alt on your keyboard and click the Add Vector Mask symbols that I marked with the number 2 (Two)
6. Click the Magic Wand Tool and then the selection of the face, do not forget to activate the first Use All Layer

Selection of all parts of the skin, leaving the eyes and lips
7. Then click the Brush Tool and smooth section above we have selected last

Then Deselect (Ctrl + D)
8.Create another Layer (Layer >> New >> Layer ...) (Ctrl + Shift + N)

Activate Use Previous Layer, as I note in red above.
9. Back again to the layer above was ilmugrafis, click on the photo (1), then press Ctrl and click on the Vector Mask (2)

Then press Ctrl + C (Copy), switch back again layer 1, and then press Ctrl + V (Paste) it will look like the image below.

10. After that Blur layer above was (Filter >> Blur >> Gaussian Blur) and will look like the image below

Adjust Radius.
11. Then again Duplicate Layer 1

then press Ctrl + Shift + U (Desaturate), change its blending to Soft Light, then give a little Noise (Filter >> Noise >> Add Noise) To impress Natural without manipulation
back to last ilmugrafis layer and change the opacity to about 82 or 80 or maybe up to you, then change the layer 1 also opagitynya a 70-80 ...
12. Iiiiyyyeeessss ... work .. work .. horay .... and results

Hilary Duff, Make over photo by Ervyn
Note: Photos after the make-over to look more refined and smooth whiteSo that people understand a little of the many .
Still tetep ... Stop Global Warming n 'Go Green ....
Stay Tune for Extreme Manipulation (Wish me luck dude .. haha)
survivors learn Photoshop


Post a Comment